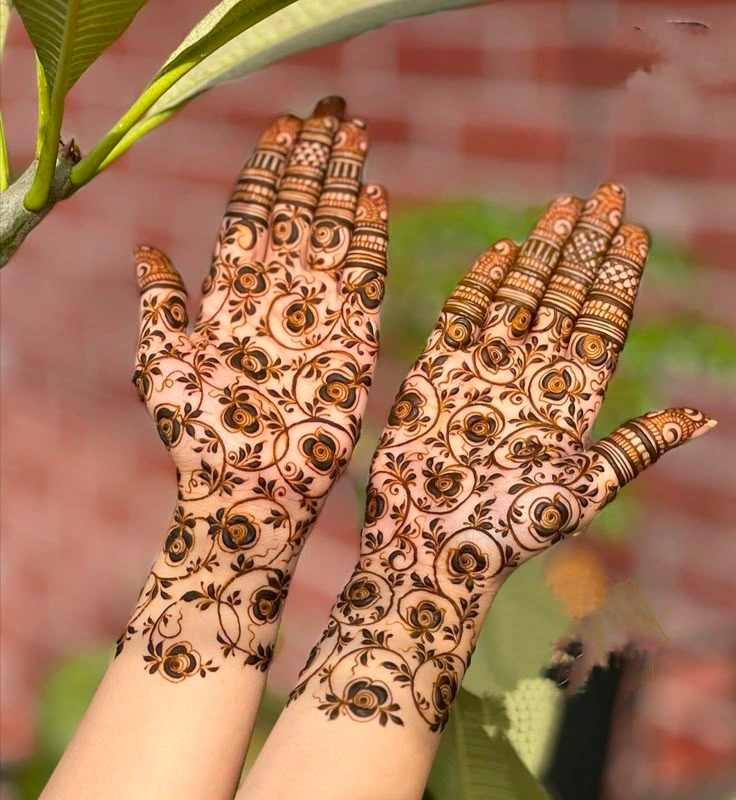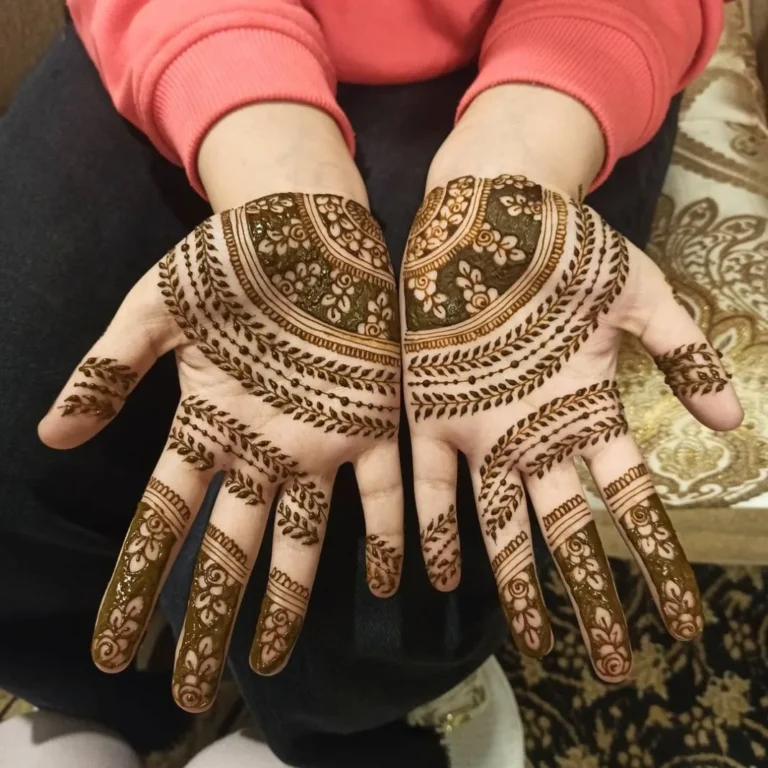
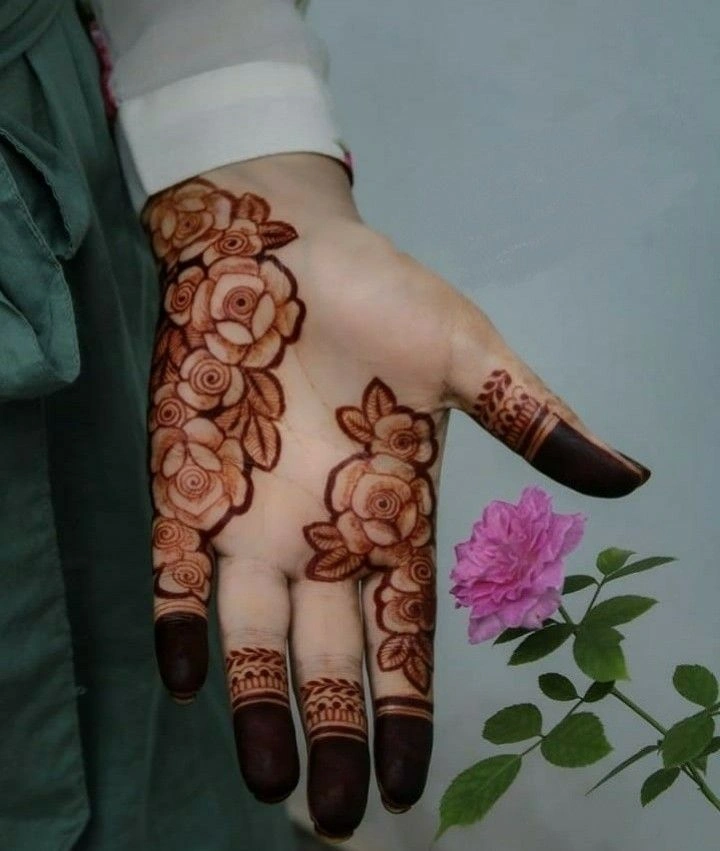
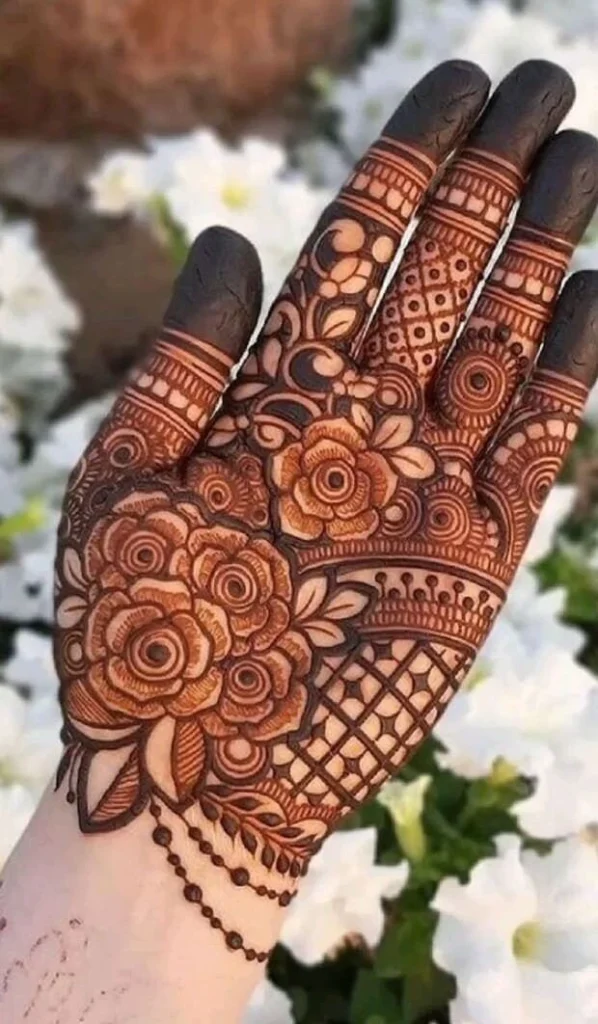
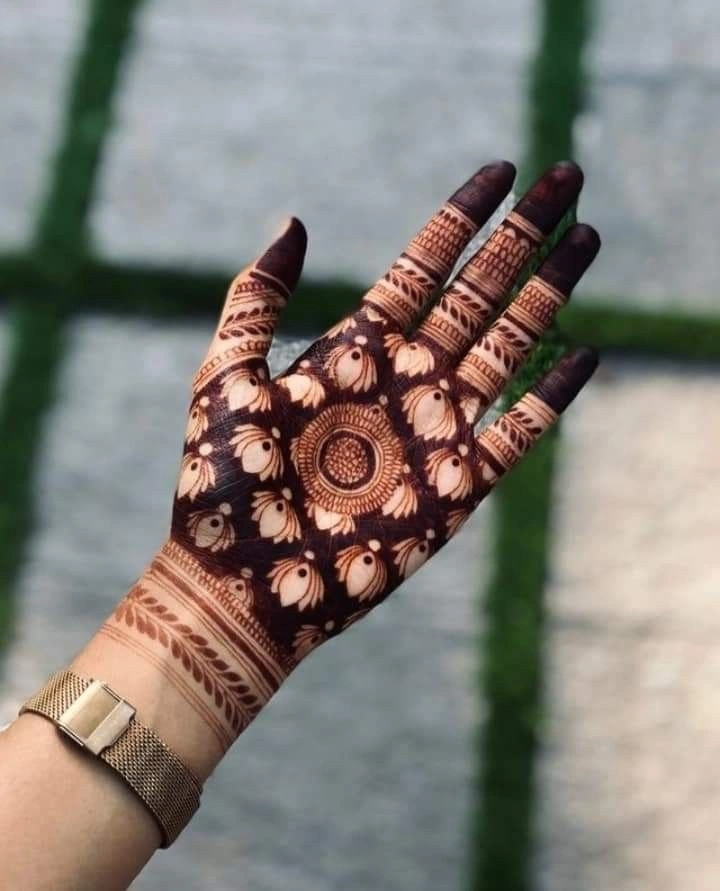
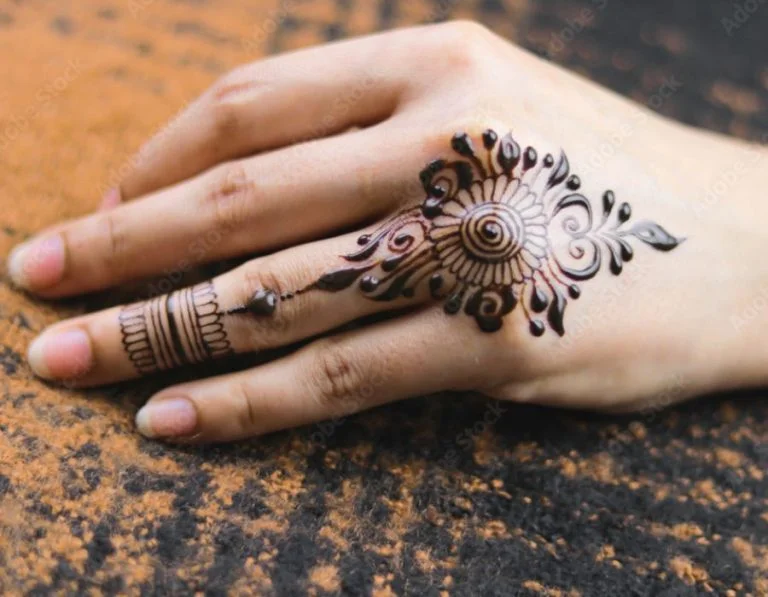
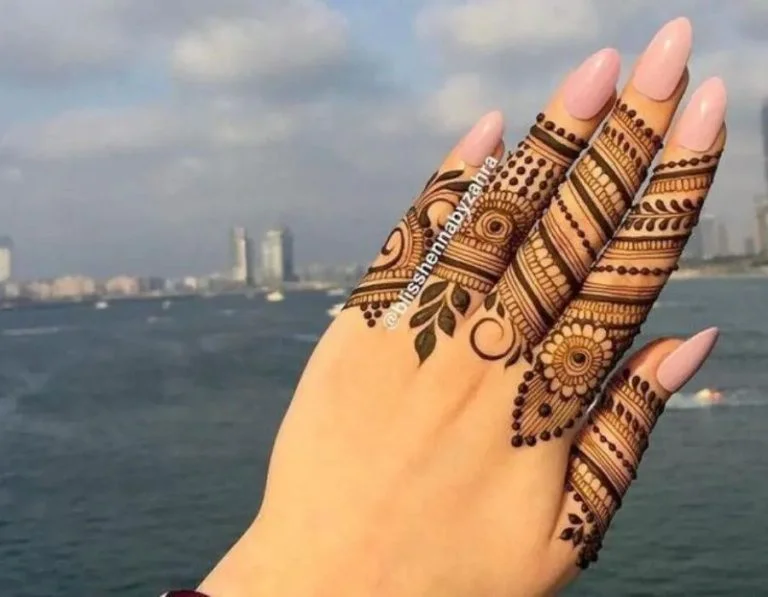
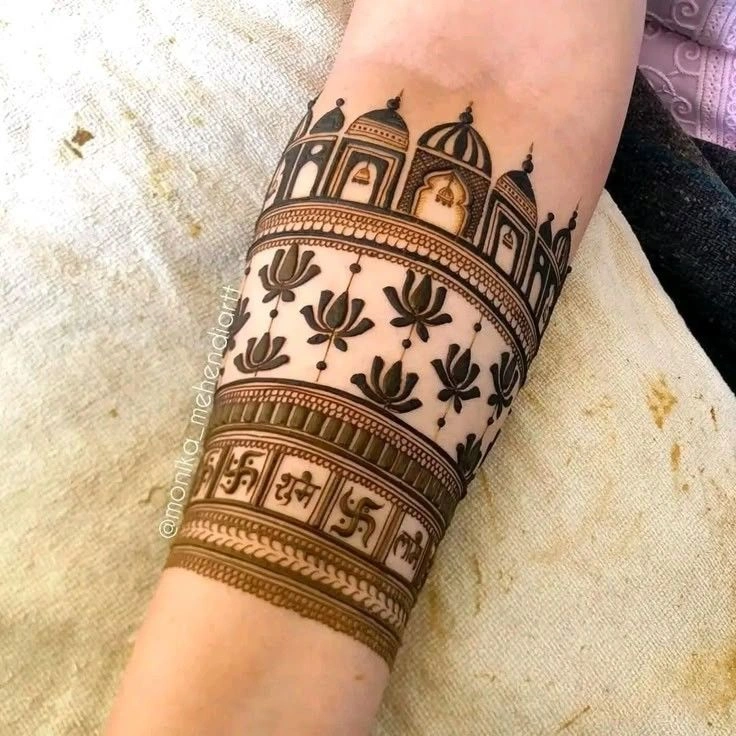
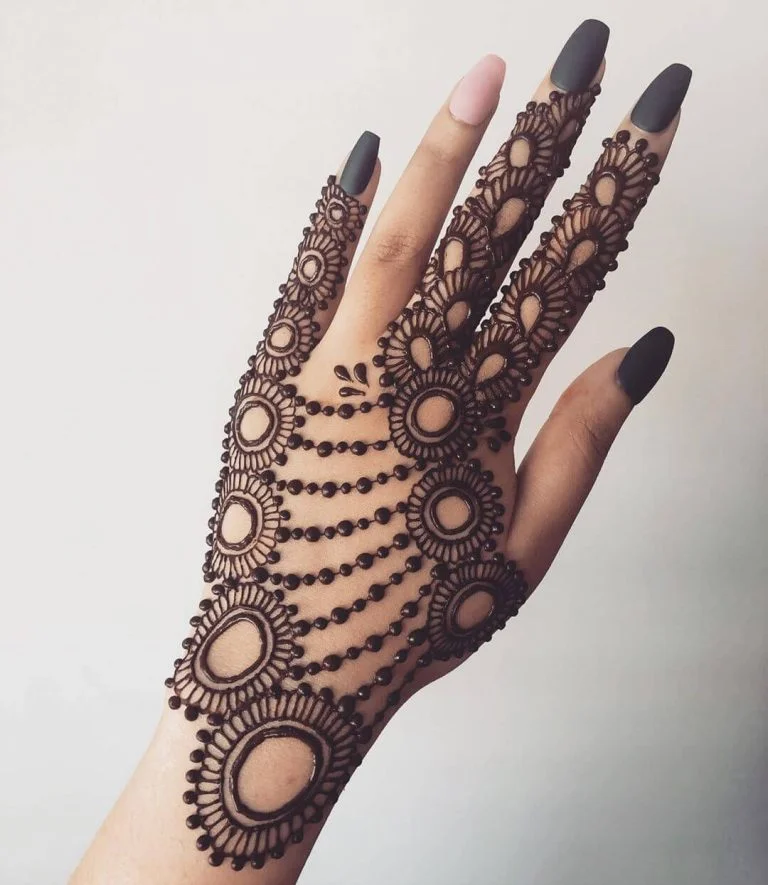
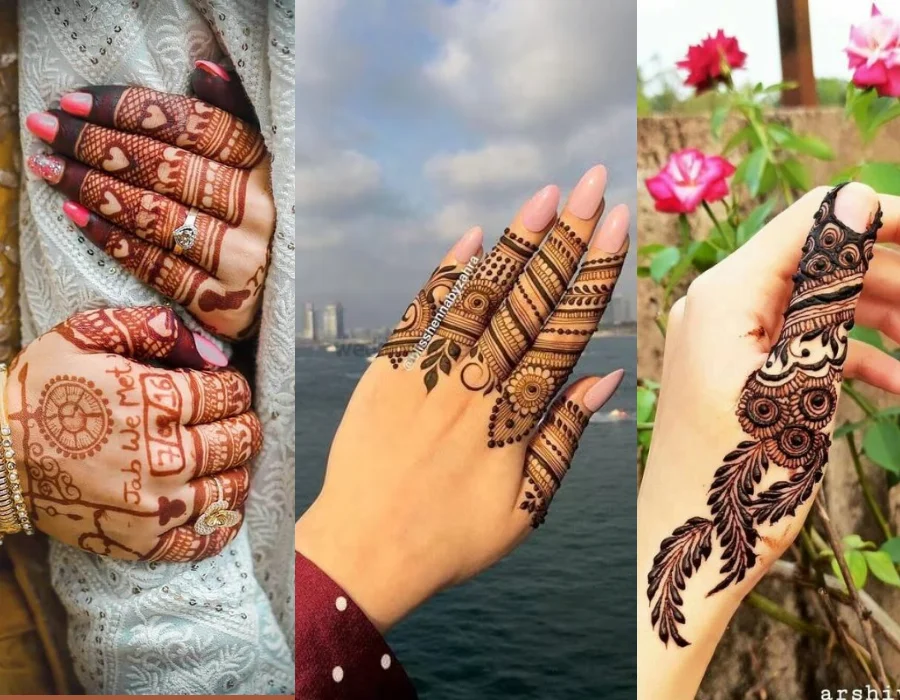
Easy, Quick & Beginner-Friendly Designs
आसान, त्वरित और शुरुआती के लिए उपयुक्त डिज़ाइन उन लोगों के लिए एकदम सही विकल्प हैं जो बिना ज्यादा समय या मेहनत लगाए सुंदर मेहंदी पैटर्न बनाना चाहते हैं।
Table of Contents
चाहे आप एक शुरुआत कर रहे हैं या सिर्फ एक तेज़ लेकिन शानदार डिज़ाइन चाहते हैं, आसान, त्वरित और शुरुआती के लिए उपयुक्त डिज़ाइन आपको मेहंदी कला के साथ आरामदायक और मज़ेदार तरीके से प्रयोग करने की सुविधा देते हैं। ये डिज़ाइन आसानी से फॉलो किए जा सकते हैं, जिनमें साफ़-सुथरी लाइन्स और न्यूनतम तत्व शामिल हैं, जिन्हें कोई भी व्यक्ति, थोड़े या बिना अनुभव के भी आजमा सकता है। त्योहारों, उत्सवों या रोज़मर्रा के अवसरों के लिए आदर्श, आसान, त्वरित और शुरुआती के लिए उपयुक्त डिज़ाइन आपको जटिल तकनीकों की आवश्यकता के बिना एक सुंदर और पॉलिश लुक देने में मदद करते हैं। फूल, पत्ते, दिल और डॉट्स जैसे मोटिफ़ के साथ, ये डिज़ाइन पारंपरिक मेहंदी शैलियों में एक ताज़ा और आधुनिक ट्विस्ट लाते हैं। जो लोग रचनात्मक होना चाहते हैं लेकिन जटिल पैटर्न के लिए समय या कौशल नहीं रखते, उनके लिए आसान, त्वरित और शुरुआती के लिए उपयुक्त डिज़ाइन सुंदरता और सरलता का सही संतुलन प्रदान करते हैं। चाहे यह एक आकस्मिक सभा के लिए हो या किसी विशेष अवसर के लिए, ये डिज़ाइन सुनिश्चित करते हैं कि हर कोई तुरंत मेहंदी की खूबसूरती का आनंद ले सके। आसान, त्वरित और शुरुआती के लिए उपयुक्त डिज़ाइन आपके मेहंदी सफ़र की शुरुआत करने और आसानी से आकर्षक पैटर्न बनाने का एक शानदार तरीका हैं।
5-Minute Mehndi Designs for Raksha Bandhan
रक्षा बंधन के लिए 5-मिनट की मेहंदी डिज़ाइन उन व्यस्त लोगों के लिए एकदम सही हैं जो खूबसूरत मेहंदी के साथ त्योहार मनाना चाहते हैं, लेकिन जिनके पास ज्यादा समय नहीं होता। ये डिज़ाइन तेज़, सरल और सुंदर हैं, जिससे ये राखी उत्सव के लिए आदर्श बन जाती हैं, जब आप जटिल पैटर्न में घंटे बिताए बिना अपने हाथों में पारंपरिक टच जोड़ना चाहते हैं।
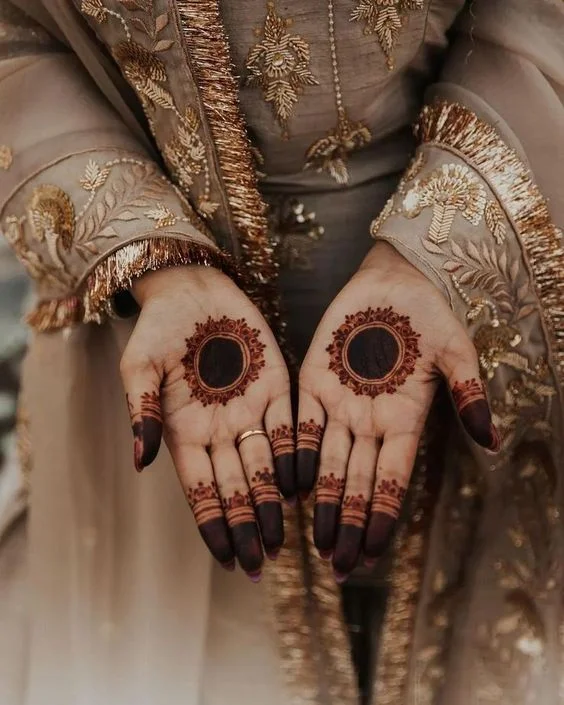
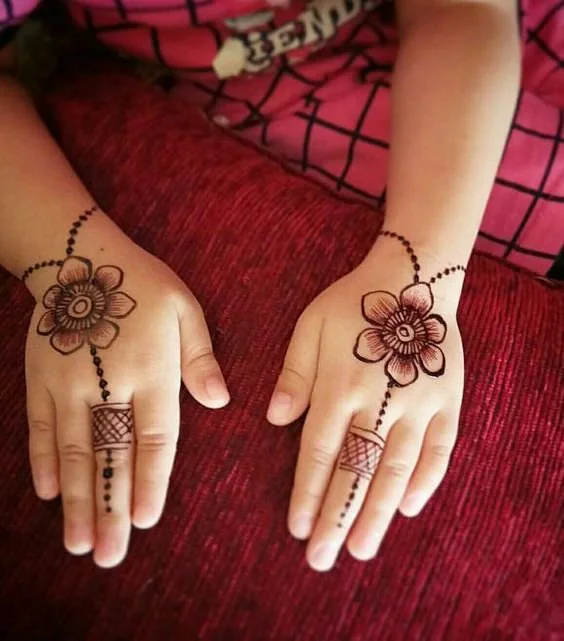
1. Simple Floral Ring
- कैसे लगाएं: अपने हाथ की हथेली के बीच में एक छोटा फूल बनाएं और इसके चारों ओर पत्तियों या पंखुड़ियों की सरल अंगूठी बनाएं। आप कुछ डॉट्स भी जोड़ सकते हैं।
- क्यों यह तेज़ है: यह डिज़ाइन न्यूनतम लेकिन सुंदर है, और इसे पूरा करने में केवल कुछ ही मिनट लगते हैं।
2. Dots and Curves Design
- कैसे लगाएं: अपने हाथ की हथेली के बीच में कुछ डॉट्स बनाएं। फिर इन डॉट्स के चारों ओर सरल घुमावदार लाइन्स जोड़ें, जिससे एक मुलायम और बहती हुई डिज़ाइन बनती है। आप इस पैटर्न को अपनी उंगलियों पर भी दोहरा सकते हैं।
- क्यों यह तेज़ है: डॉट्स और घुमावदार लाइन्स बनाना बेहद आसान है और इसे पूरा करने में केवल कुछ ही मिनट लगते हैं।
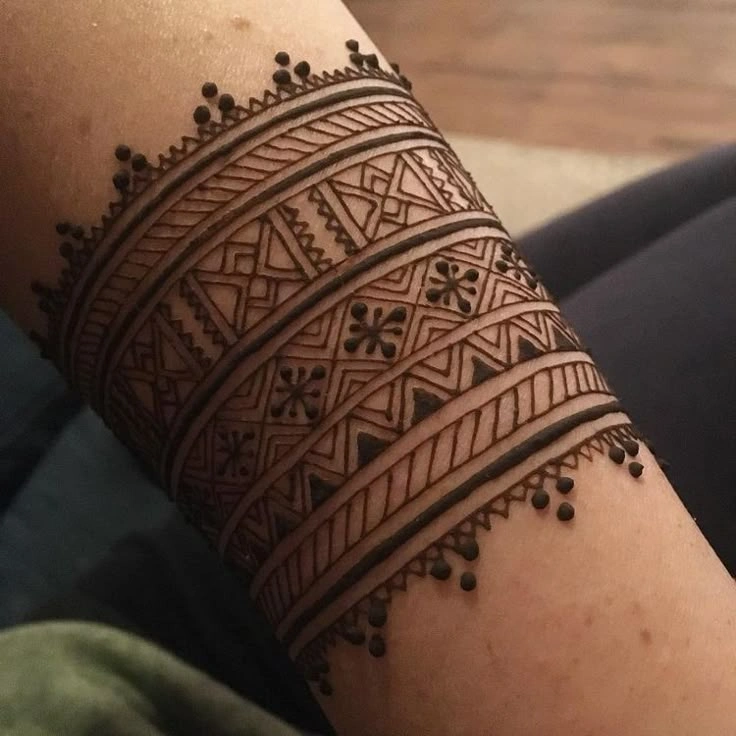
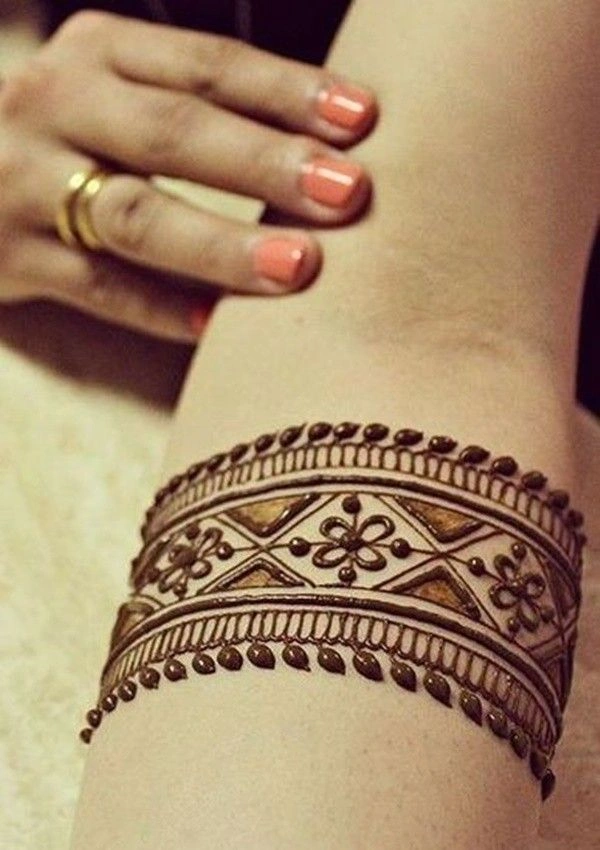
3. Wrist Band with Small Leaves
- कैसे लगाएं: अपनी कलाई के चारों ओर एक सरल लाइन बनाएं, और फिर लाइन के साथ नियमित अंतराल पर छोटे, नाजुक पत्ते या छोटे फूलों के आकार जोड़ें।
- क्यों यह तेज़ है: इस डिज़ाइन की सादगी सुनिश्चित करती है कि आप इसे केवल कुछ ही मिनटों में पूरा कर सकते हैं, जबकि पत्तियाँ एक पारंपरिक टच जोड़ती हैं।
4. Half Moon Design
- कैसे लगाएं: अपनी हथेली के बीच में आधा चाँद आकार बनाएं। इसे सुंदर दिखाने के लिए चाँद के अंदर कुछ सरल लाइनें या डॉट्स जोड़ सकते हैं।
- क्यों यह तेज़ है: आधा चाँद बनाना आसान है और बिना ज्यादा प्रयास के एक प्यारी, संतुलित डिज़ाइन देता है।
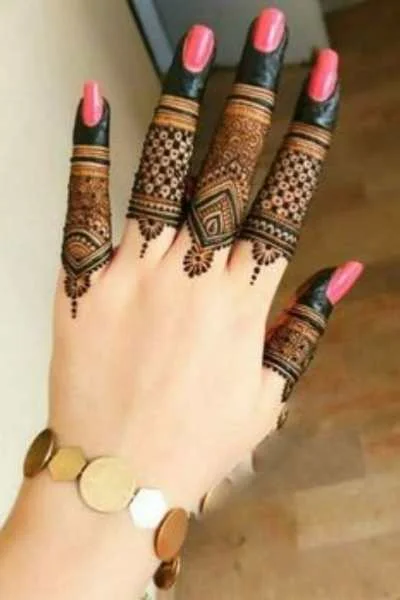
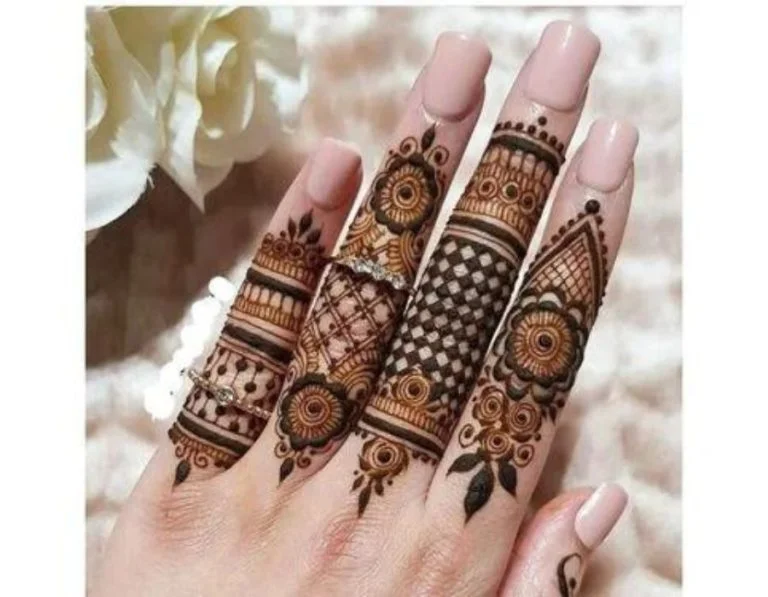
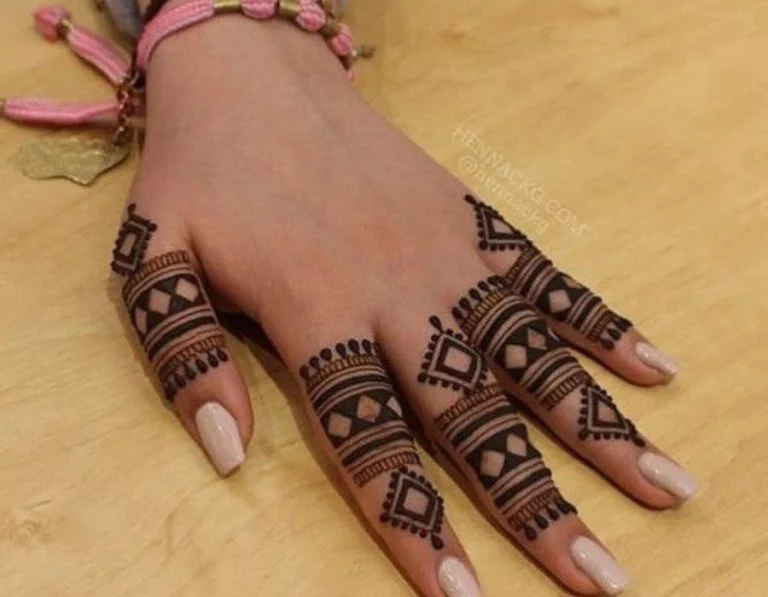
5. Simple Finger Rings
- कैसे लगाएं: अपनी उंगलियों के सिरे के चारों ओर छोटे गोल या अंडाकार आकार बनाएं, जैसे अंगूठियाँ। अतिरिक्त विवरण के लिए इन अंगूठियों के अंदर डॉट्स या पतली लाइन्स जोड़ सकते हैं।
- क्यों यह तेज़ है: यह डिज़ाइन केवल उंगलियों के सिरों को कवर करती है, जिससे इसे लगाना तेज़ और आसान हो जाता है।
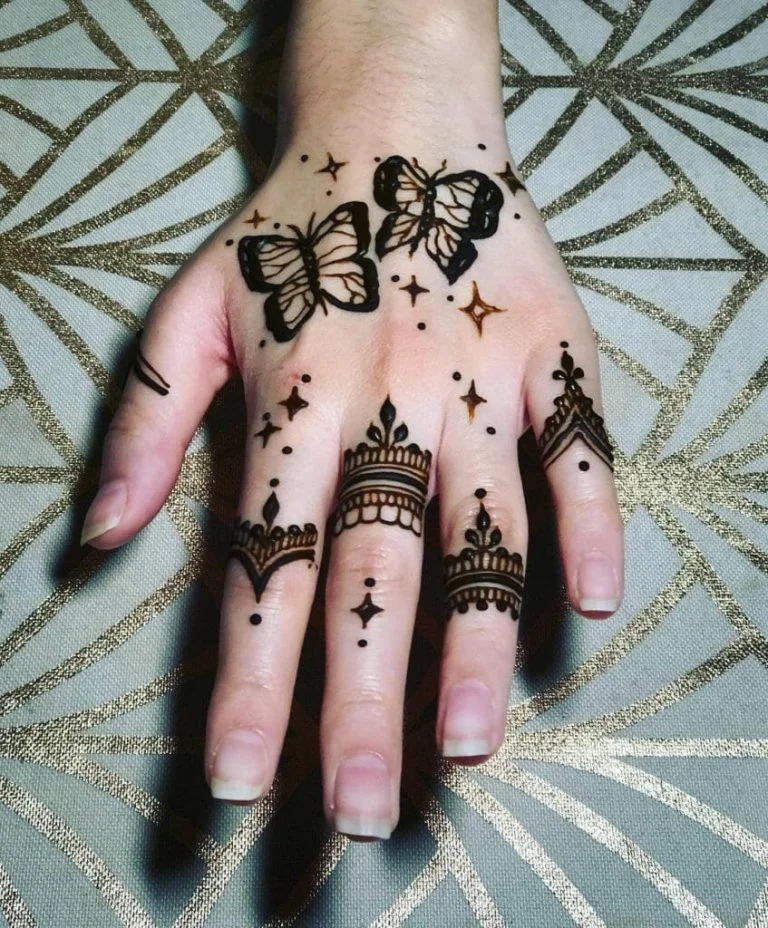
6. Paisley and Swirl Design
- कैसे लगाएं: अपने हाथ के पिछले हिस्से पर एक सरल पेस्ली आकार बनाएं और इसके चारों ओर कुछ घुमावदार लाइन्स या छोटे डॉट्स जोड़ें।
- क्यों यह तेज़ है: पेस्ली पारंपरिक मोटिफ़ हैं जिन्हें जल्दी बनाया जा सकता है, और घुमावदार लाइन्स या डॉट्स जोड़ने में केवल कुछ ही पल लगते हैं।
7. Minimalist Mandala
- कैसे लगाएं: अपनी कलाई से शुरू करके आधा मंडला बनाएं और ऊपर की ओर बढ़ाएं। इसके अंदर लाइन्स और डॉट्स के साथ परिकेंद्रित वृत्त (concentric circles) जोड़ें।
- क्यों यह तेज़ है: मंडला जटिल होते हैं, लेकिन यदि आप केवल आधा मंडला बनाते हैं, तो इसे जल्दी पूरा किया जा सकता है और कम समय में एक विस्तृत डिज़ाइन जैसा दिखता है।
8. Simple Geometric Pattern
- कैसे लगाएं: अपनी हथेली या उंगलियों पर कुछ त्रिभुज, हीरे या वर्ग बनाएं। अतिरिक्त बनावट के लिए उन्हें छोटे डॉट्स या लाइन्स से भर सकते हैं।
- क्यों यह तेज़ है: ज्यामितीय आकृतियाँ बनाना आसान और तेज़ है, और ये एक आधुनिक, साफ़-सुथरा लुक देती हैं।

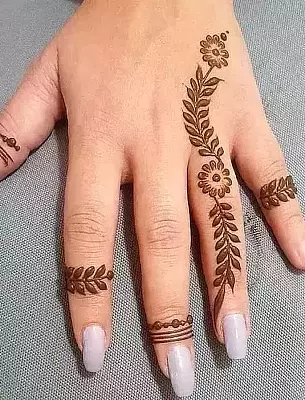
9. Flower Vine Around the Wrist
- कैसे लगाएं: कलाई से शुरू करके एक सरल बेल बनाएं और बेल के साथ छोटे फूल या पत्तियाँ जोड़ें। इस डिज़ाइन को आगे बढ़ाकर अग्रभुजा (forearm) के हिस्से तक फैलाया जा सकता है।
- क्यों यह तेज़ है: यह डिज़ाइन सरल लेकिन खूबसूरत है, और केवल कुछ ही मिनटों में एक सुंदर, बहती हुई पैटर्न तैयार की जा सकती है।
10. Minimal Curved Line Design
- कैसे लगाएं: अपनी कलाई से शुरू होकर हथेली के केंद्र की ओर घुमावदार लाइन बनाएं। अतिरिक्त सजावट के लिए लाइन के साथ डॉट्स या छोटे दिल जोड़ सकते हैं।
- क्यों यह तेज़ है: एक सरल, बहती हुई लाइन बनाने में बहुत कम समय लगता है और इसे केवल कुछ ही मिनटों में पूरा किया जा सकता है, जो तेज़ मेहंदी लगाने के लिए बिल्कुल सही है।

Why Choose 5-Minute Mehndi Designs for Raksha Bandhan?
- समय बचाने वाले: ये डिज़ाइन जल्दी लगाए जा सकते हैं, जिससे आप व्यस्त शेड्यूल के बावजूद त्योहार की खुशियाँ महसूस कर सकते हैं।
- सौम्य और सरल: खूबसूरत मेहंदी डिज़ाइन बनाने के लिए जटिल पैटर्न की जरूरत नहीं है। ये सरल डिज़ाइन सुंदर और अवसर के लिए उपयुक्त हैं।
- शुरुआत करने वालों के लिए आदर्श: चाहे आप मेहंदी में नए हों या जल्दी में डिज़ाइन लगाना चाहते हों, ये डिज़ाइन आसानी से फॉलो और लागू किए जा सकते हैं, भले ही अनुभव कम हो।
रक्षा बंधन के लिए 5-मिनट की मेहंदी डिज़ाइन परंपरा और सुविधा का सही संतुलन प्रदान करती हैं। इन तेज़ डिज़ाइनों के साथ, आप सबसे व्यस्त दिनों में भी खूबसूरत मेहंदी लुक के साथ रक्षा बंधन मना सकते हैं।

Quick Mehndi for Busy Women on Rakhi
राखी पर व्यस्त महिलाओं के लिए तेज़ मेहंदी एकदम सही समाधान प्रदान करती है उन महिलाओं के लिए जो त्योहार का आनंद लेना चाहती हैं लेकिन जटिल मेहंदी डिज़ाइनों में ज्यादा समय नहीं लगा सकतीं। ये डिज़ाइन तेज़, सरल और फिर भी सुंदर हैं, जिससे आप समय की चिंता किए बिना रक्षा बंधन को खूबसूरत मेहंदी के साथ मना सकती हैं।

1. Wrist Band Design
- कैसे लगाएं: अपनी कलाई के चारों ओर एक सरल लाइन बनाएं। अतिरिक्त विवरण के लिए लाइन के साथ छोटे, सुंदर डॉट्स, घुमावदार लाइन्स या छोटे पेस्ली जोड़ सकते हैं।
- क्यों यह तेज़ है: इस डिज़ाइन को बनाने में केवल कुछ ही मिनट लगते हैं और इसे बनाने में बहुत कम मेहनत चाहिए, फिर भी यह स्टाइलिश और आकर्षक दिखती है।

2. Finger Tips Dots
- कैसे लगाएं: अपनी उंगलियों के सिरों पर छोटे डॉट्स या छोटे डिज़ाइन बनाएं, या उंगलियों के किनारों के साथ डॉट्स की एक सरल लाइन बनाएं।
- क्यों यह तेज़ है: यह डिज़ाइन लगाना बेहद तेज़ है, और आप इसे सिर्फ कुछ उंगलियों पर भी जोड़ सकते हैं, जिससे एक हल्का लेकिन त्योहारीन टच मिलता है।
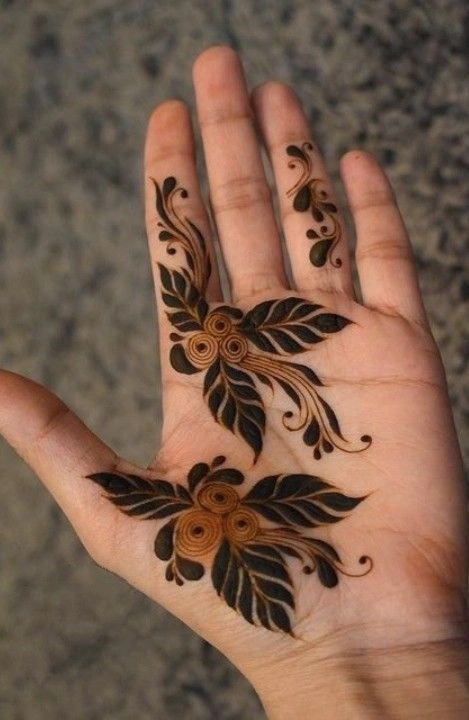
3. Single Flower Design
- कैसे लगाएं: अपनी हथेली के बीच में एक छोटा फूल बनाएं। इसके चारों ओर छोटे पत्ते या पंखुड़ियाँ जोड़ें और अंत में कुछ सरल डॉट्स डालें।
- क्यों यह तेज़ है: फूल का डिज़ाइन सरल है और इसे पूरा करने में ज्यादा समय नहीं लगता, फिर भी यह सुंदर और पारंपरिक दिखता है।
4. Minimalist Geometric Lines
- कैसे लगाएं: अपने हाथ के पिछले हिस्से पर सीधी लाइन्स का उपयोग करके त्रिभुज या हीरे का आकार बनाएं। अतिरिक्त विवरण के लिए लाइन्स के चारों ओर छोटे डॉट्स जोड़ें।
- क्यों यह तेज़ है: ज्यामितीय डिज़ाइन सरल होते हैं और इनमें जटिल विवरण की आवश्यकता नहीं होती, जिससे यह व्यस्त महिलाओं के लिए तेज़ और फैशनेबल विकल्प बन जाता है।
5. Simple Leaf Patterns
- कैसे लगाएं: अपनी उंगलियों या हाथ के किनारे पर कुछ सरल पत्तियाँ बनाएं। इन्हें सुंदर दिखाने के लिए छोटे घुमाव या कर्व भी जोड़ सकते हैं।
- क्यों यह तेज़ है: पत्तियों के डिज़ाइन आसान होते हैं और जल्दी लगाए जा सकते हैं, जिससे यह कम समय वाली महिलाओं के लिए एक आदर्श विकल्प बन जाता है।
6. Half Mandala Design
- कैसे लगाएं: अपनी कलाई से शुरू करके आधा मंडला बनाएं और इसे हथेली की ओर बढ़ाएं। डिज़ाइन पूरा करने के लिए परिकेंद्रित वृत्त या सरल लाइन्स जोड़ सकते हैं।
- क्यों यह तेज़ है: आधा मंडला जटिल दिखता है, लेकिन इसे जल्दी पूरा किया जा सकता है और यह पारंपरिक तथा स्टाइलिश लुक देता है।
7. Single Line Around Wrist
- कैसे लगाएं: अपनी कलाई के चारों ओर एक सरल, लगातार लाइन बनाएं और नियमित अंतराल पर छोटे डॉट्स या छोटे डिज़ाइन जोड़ें। यह न्यूनतम डिज़ाइन साफ़ और सुंदर लुक देता है।
- क्यों यह तेज़ है: इस डिज़ाइन की सादगी इसे सबसे तेज़ बनाने में मदद करती है, जो उन महिलाओं के लिए आदर्श है जो जल्दी में कुछ स्टाइलिश चाहती हैं।
8. Simple Heart Design
- कैसे लगाएं: अपनी हथेली के बीच में या कलाई के पास एक छोटा दिल बनाएं, और इसके चारों ओर डॉट्स या छोटे घुमाव जोड़ें।
- क्यों यह तेज़ है: दिल का आकार बनाना आसान है और इसे कुछ ही मिनटों में पूरा किया जा सकता है, जिससे यह व्यस्त महिलाओं के लिए आदर्श है।
9. Abstract Swirls
- कैसे लगाएं: अपनी हथेली या उंगलियों पर हल्के घुमावदार पैटर्न बनाएं और उन्हें छोटे डॉट्स या लाइन्स से जोड़ें।
- क्यों यह तेज़ है: अमूर्त (abstract) पैटर्न जल्दी बनाए जा सकते हैं और इनमें सटीकता की जरूरत नहीं होती, जिससे यह जल्दी डिज़ाइन चाहिए महिलाओं के लिए उपयुक्त है।
10. Tiny Paisleys
- कैसे लगाएं: अपनी उंगलियों या हाथ के ऊपर कुछ छोटे पेस्ली आकार बनाएं और उन्हें छोटे डॉट्स या लाइन्स से भरें।
- क्यों यह तेज़ है: पेस्ली बनाना आसान है और इसमें ज्यादा समय नहीं लगता, जिससे यह तेज़ और स्टाइलिश मेहंदी डिज़ाइन के लिए आदर्श विकल्प है।
Why Choose Quick Mehndi Designs for Busy Women on Rakhi?
- समय बचाने वाले: ये डिज़ाइन जल्दी लगाए जा सकते हैं, जिससे आप लंबे समय तक मेहंदी लगाने की चिंता किए बिना राखी मना सकते हैं।
- सौम्य लेकिन सरल: जटिल डिज़ाइनों के बिना भी आप खूबसूरत और त्योहारी लुक पा सकते हैं।
- शुरुआत करने वालों के लिए आदर्श: यदि आप मेहंदी में नए हैं, तो ये सरल डिज़ाइन शुरूआत करने के लिए एक बेहतरीन विकल्प हैं।
- कस्टमाइज़ेबल: आप विभिन्न तत्वों को मिलाकर ऐसा डिज़ाइन बना सकते हैं जो आपकी शैली और उपलब्ध समय के अनुसार उपयुक्त हो।
राखी पर व्यस्त महिलाओं के लिए तेज़ मेहंदी सुनिश्चित करती है कि आप भले ही व्यस्त शेड्यूल में हों, फिर भी खूबसूरत मेहंदी के साथ उत्सव में शामिल हो सकें। ये सरल डिज़ाइन राखी के त्योहार की खुशियाँ बढ़ाने का एक आसान तरीका प्रदान करती हैं, जो तेज़ और सुविधाजनक भी है।
No-Cone Mehndi Designs for Raksha Bandhan
रक्षा बंधन के लिए नो-कॉन मेहंदी डिज़ाइन मेहंदी लगाने का एक शानदार और शुरुआती के लिए उपयुक्त तरीका है, जिसमें पारंपरिक मेहंदी कॉन की आवश्यकता नहीं होती। यह तकनीक उन लोगों के लिए विशेष रूप से उपयोगी है जिनके पास सही उपकरण नहीं हैं लेकिन फिर भी वे मेहंदी की सुंदरता और परंपरा का आनंद लेना चाहते हैं। चाहे आप तेज़ और सरल डिज़ाइन चाहते हों या जटिल पैटर्न, नो-कॉन मेहंदी डिज़ाइन आपको टूथपिक, ब्रश या अपनी उंगलियों जैसे आसानी से उपलब्ध उपकरणों का उपयोग करके रचनात्मकता अपनाने की सुविधा देती है।
Simple Tools You Can Use for No-Cone Mehndi:
- टूथपिक: महीन लाइन्स और डॉट्स बनाने के लिए टूथपिक का उपयोग करें।
- ब्रश: मेहंदी पेस्ट लगाने और बड़े, स्पष्ट पैटर्न बनाने के लिए छोटे पेंटब्रश या मेकअप ब्रश का उपयोग किया जा सकता है।
- अपनी उंगलियाँ: मेहंदी पेस्ट को अपनी उंगलियों से लगाकर और आकार देकर सरल डिज़ाइन आसानी से बनाए जा सकते हैं।
Step-by-Step Guide for No-Cone Mehndi Designs for Raksha Bandhan:

- Preparation
- अपने हाथों को अच्छी तरह से साफ़ करें ताकि धूल, तेल या लोशन हट जाएं।
- अपनी मेहंदी पेस्ट तैयार करें। आप तैयार मेहंदी पेस्ट का उपयोग कर सकते हैं या मेहंदी पाउडर को पानी के साथ मिलाकर एक चिकना, गाढ़ा पेस्ट बना सकते हैं।
- अपने उपकरण इकट्ठा करें, जैसे टूथपिक, ब्रश या अपनी उंगलियाँ।
- Start with Simple Outlines
- अपनी हथेली या हाथ के पिछले हिस्से पर एक सरल रूपरेखा बनाकर शुरू करें। आप डिज़ाइन के आधार के रूप में एक सरल अंडाकार, वर्ग या गोलाकार बॉर्डर बना सकते हैं।
- यदि आप कम संरचित डिज़ाइन पसंद करते हैं, तो आप घुमावदार या मुलायम कर्व जैसी मुक्त प्रवाह वाली आकृतियाँ बना सकते हैं।
- Create Dots and Lines
- रूपरेखा सेट होने के बाद, टूथपिक या ब्रश का उपयोग करके रूपरेखा के अंदर डॉट्स या छोटी लाइन्स जोड़ें। डॉट्स को किनारों, बीच में या डिज़ाइन में कहीं भी रखा जा सकता है।
- पंखुड़ियों के आकार या अमूर्त पैटर्न बनाने के लिए घुमावदार लाइन्स का उपयोग करें। आप ये डिज़ाइन उंगलियों पर भी बना सकते हैं, जिससे एक समान रूप मिलता है।
- Add Simple Motifs
- छोटे फूल, पत्तियाँ या पेस्ली जैसे मूल मोटिफ़ शामिल करें। इन्हें आसानी से ब्रश या टूथपिक को पेस्ट में दबाकर गोल या नुकीले आकार में बनाया जा सकता है।
- डिज़ाइन को हल्का और न्यूनतम रखें, जिससे यह कोमल लेकिन सुंदर दिखे।
- Experiment with Geometric Shapes
- त्रिभुज, हीरे या वर्ग जैसी ज्यामितीय आकृतियाँ आसानी से टूथपिक का उपयोग करके बनाई जा सकती हैं।
- ये आकृतियाँ साफ़-सुथरा, आधुनिक लुक देती हैं, जो रक्षा बंधन के उत्सव के लिए बिल्कुल उपयुक्त है।
- Decorate the Fingers
- अपनी उंगलियों पर कुछ लाइन्स, डॉट्स या छोटे फूलों के पैटर्न बनाकर सरल डिज़ाइन जोड़ें।
- अपनी कलाई के चारों ओर डॉट्स या लाइन आधारित मोटिफ़ का उपयोग करके ब्रेसलेट जैसी पैटर्न बनाएं, जिससे आपकी मेहंदी को अधिक भरा हुआ लुक मिले।
- Let the Mehndi Dry
- मेहंदी को पूरी तरह सूखने दें। इसमें लगभग 20 से 30 मिनट लग सकते हैं।
- डिज़ाइन पूरी तरह सेट होने तक किसी चीज़ को छूने से बचें, ताकि स्मजिंग न हो।
- Remove the Dried Mehndi
- सूखने के बाद, अपनी उंगलियों या किसी钝 उपकरण का उपयोग करके धीरे से सूखी मेहंदी पेस्ट को हटा दें। पानी का उपयोग न करें, क्योंकि इससे मेहंदी के रंग पर असर पड़ सकता है।
- Enhance the Stain (Optional)
- यदि आप गहरा रंग चाहते हैं, तो सूखी डिज़ाइन पर नींबू का रस और शक्कर का मिश्रण लगाएँ। इसे कुछ मिनट के लिए रहने दें, फिर पोंछ दें। इससे मेहंदी का रंग गहरा होगा।
Why Choose No-Cone Mehndi Designs for Raksha Bandhan?
- आसान और सुलभ: इसके लिए विशेष उपकरणों की जरूरत नहीं है। केवल एक सरल ब्रश या टूथपिक से आप खूबसूरत मेहंदी डिज़ाइन बना सकते हैं।
- तेज़ लगाना: ये डिज़ाइन जल्दी लगाई जा सकती हैं, जिससे यह उन लोगों के लिए आदर्श है जिनके पास समय कम है लेकिन वे रक्षा बंधन पर त्योहारी लुक चाहते हैं।
- शुरुआत करने वालों के लिए उपयुक्त: नो-कॉन मेहंदी शुरुआती लोगों के लिए बिल्कुल सही है क्योंकि आपको कॉन संभालने की चिंता नहीं करनी पड़ती। आप अपनी उंगलियों या उपकरणों का उपयोग करके स्वतंत्र रूप से मेहंदी लगा सकते हैं, जो कम डरावना है।
- कस्टमाइज़ेबल: डॉट्स, लाइन्स और आकृतियों को मिलाकर आप सरल पैटर्न से लेकर जटिल डिज़ाइन तक विभिन्न प्रकार की डिज़ाइन बना सकते हैं।
रक्षा बंधन के लिए नो-कॉन मेहंदी डिज़ाइन आपके उत्सव में पारंपरिक टच जोड़ने का एक मज़ेदार, रचनात्मक और आसान तरीका हैं। चाहे आप तेज़ डिज़ाइन चाहते हों या पहली बार पैटर्न के साथ प्रयोग कर रहे हों, ये सरल तरीके सुनिश्चित करते हैं कि आप जटिल उपकरणों की आवश्यकता के बिना मेहंदी की सुंदरता का आनंद ले सकें।
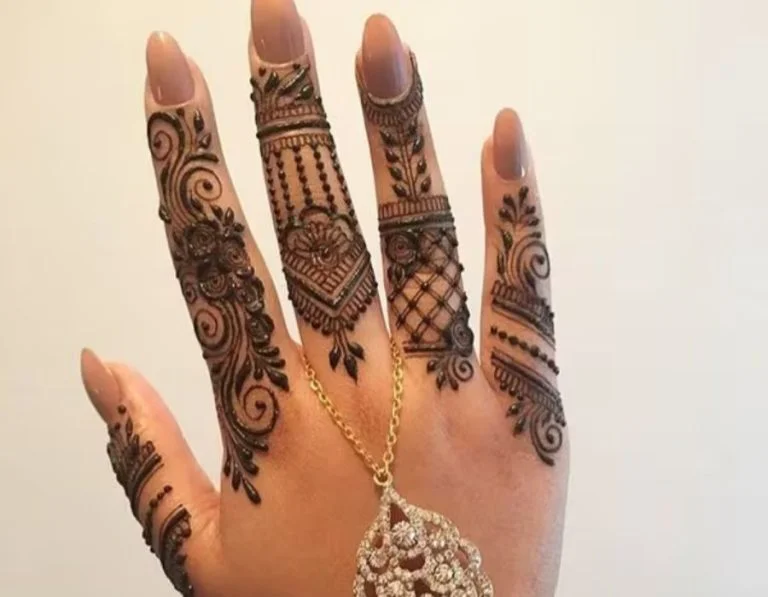
Quick Dots & Lines Mehndi for Beginners
नए लोगों के लिए क्विक डॉट्स और लाइन्स मेहंदी शुरुआत करने वालों के लिए एकदम सही तरीका है, जिससे वे जटिल डिज़ाइनों से खुद को बोझिल किए बिना मेहंदी कला का अनुभव कर सकें। ये सरल पैटर्न आसानी से लगाए जा सकते हैं, जल्दी बनते हैं, और किसी भी अवसर पर खूबसूरत दिख सकते हैं, विशेषकर राखी जैसे त्योहारी उत्सवों में।
Step-by-Step Guide for Quick Dots & Lines Mehndi:
- Preparation
- अपने हाथों को साबुन और पानी से अच्छी तरह साफ़ करें ताकि तेल, लोशन या गंदगी हट जाए।
- मेहंदी अच्छी तरह चिपके इसलिए अपने हाथों को तौलिये से सुखाएँ।
- तैयार मेहंदी कॉन का उपयोग करें या मेहंदी पाउडर को पानी के साथ मिलाकर चिकना पेस्ट बनाएं।
- Start with the Outline
- अपनी कलाई, हाथ के पिछले हिस्से या उंगलियों के चारों ओर एक सरल रूपरेखा बनाकर शुरू करें। आप आधार के रूप में एक गोल या अंडाकार आकार बना सकते हैं।
- यह रूपरेखा आपको मार्गदर्शन करेगी और आपके डिज़ाइन के लिए एक साफ़ सीमा तैयार करेगी।
- Add Dots
- रूपरेखा के अंदर छोटे डॉट्स जोड़ना शुरू करें। आप इन्हें यादृच्छिक (random) या किसी पैटर्न, जैसे पंक्ति या घुमावदार (spiral) रूप में रख सकते हैं, जिससे डिज़ाइन में बनावट और रुचि आए।
- डॉट्स लगाना आसान होता है और इन्हें डिज़ाइन में कहीं भी फैलाया जा सकता है, जिससे यह और भी जीवंत दिखे।
- Incorporate Lines
- इसके बाद, डॉट्स के चारों ओर या उनके बीच में लाइन्स जोड़ें। आप खाली जगह भरने और डिज़ाइन में आयाम जोड़ने के लिए सीधी, ज़िगज़ैग या घुमावदार लाइन्स का उपयोग कर सकते हैं।
- डिज़ाइन में विविधता लाने के लिए मोटी और पतली लाइन्स का मिश्रण जोड़ने की कोशिश करें।
- Decorate the Fingers
- एक पूर्ण लुक पाने के लिए उंगलियों पर छोटे लाइन्स या कुछ अतिरिक्त डॉट्स जैसे सरल डिज़ाइन जोड़ें।
- अतिरिक्त सुंदरता के लिए अपनी कलाई के चारों ओर छोटे ब्रेसलेट जैसे डिज़ाइन भी जोड़ सकते हैं।
- Allow the Mehndi to Dry
- डिज़ाइन पूरा होने के बाद, मेहंदी को 20-30 मिनट तक सूखने दें और इस समय के दौरान किसी चीज़ को छूने से बचें ताकि स्मजिंग न हो।
- Remove the Dried Mehndi
- पेस्ट सूखने के बाद, इसे अपनी उंगलियों या किसी钝 उपकरण से धीरे से हटा दें। पानी का उपयोग न करें, क्योंकि इससे रंग की गहराई कम हो सकती है।
- शुरू में डिज़ाइन का रंग हल्का होगा, लेकिन समय के साथ यह गहरा हो जाएगा।
- Enhance the Stain (Optional)
- यदि आप गहरा रंग चाहते हैं, तो डिज़ाइन पर नींबू और शक्कर का मिश्रण लगाएँ, कुछ मिनट के लिए छोड़ दें, फिर पोंछ दें।

Why Choose Quick Dots & Lines Mehndi?
यह स्टाइल शुरुआती लोगों के लिए बिल्कुल उपयुक्त है क्योंकि:
- सीखने में आसान: ये पैटर्न सरल हैं और उन्नत कौशल की आवश्यकता नहीं है।
- जल्दी लगाने योग्य: डिज़ाइन केवल कुछ ही मिनटों में पूरा किया जा सकता है।
- कस्टमाइज़ेबल: डॉट्स, लाइन्स या उनके स्थान को बदलकर आप अनगिनत वेरिएशन बना सकते हैं।
क्विक डॉट्स और लाइन्स मेहंदी शुरुआती लोगों के लिए हाथों में खूबसूरती जोड़ने का आदर्श तरीका है, जिसमें ज्यादा समय या अनुभव की आवश्यकता नहीं होती। चाहे यह किसी त्योहार, विशेष आयोजन या सिर्फ खुद को व्यक्त करने का मज़ेदार तरीका हो, ये सरल डिज़ाइन मेहंदी को सभी के लिए आसान और सुलभ बनाते हैं!
Step-by-Step Mehndi Application Guide – Rakhi Special
स्टेप-बाय-स्टेप मेहंदी अप्लिकेशन गाइड – राखी स्पेशल आपको रक्षा बंधन के त्योहारी अवसर के लिए खूबसूरत और जटिल मेहंदी डिज़ाइन बनाने में मदद करने के लिए तैयार किया गया है। मेहंदी लगाना एक मज़ेदार और रचनात्मक प्रक्रिया है, जिसे आप घर पर या किसी पेशेवर के साथ कर सकते हैं, और यह राखी के दौरान बहुत महत्वपूर्ण है क्योंकि यह भाई-बहन के बीच प्रेम, खुशी और बंधन का प्रतीक है। यहाँ राखी पर परफेक्ट मेहंदी लगाने में आपकी मदद करने के लिए एक सरल गाइड दी गई है:
1. Prepare Your Hands and Skin
अपने हाथों को अच्छी तरह से साफ़ करें ताकि किसी भी तेल, लोशन या गंदगी को हटाया जा सके। साबुन और पानी से धोएँ और फिर साफ़ तौलिये से सुखाएँ। यह कदम सुनिश्चित करता है कि मेहंदी अच्छी तरह चिपके और गहरा, लंबे समय तक टिकने वाला रंग दे।
2. Choose Your Mehndi Design
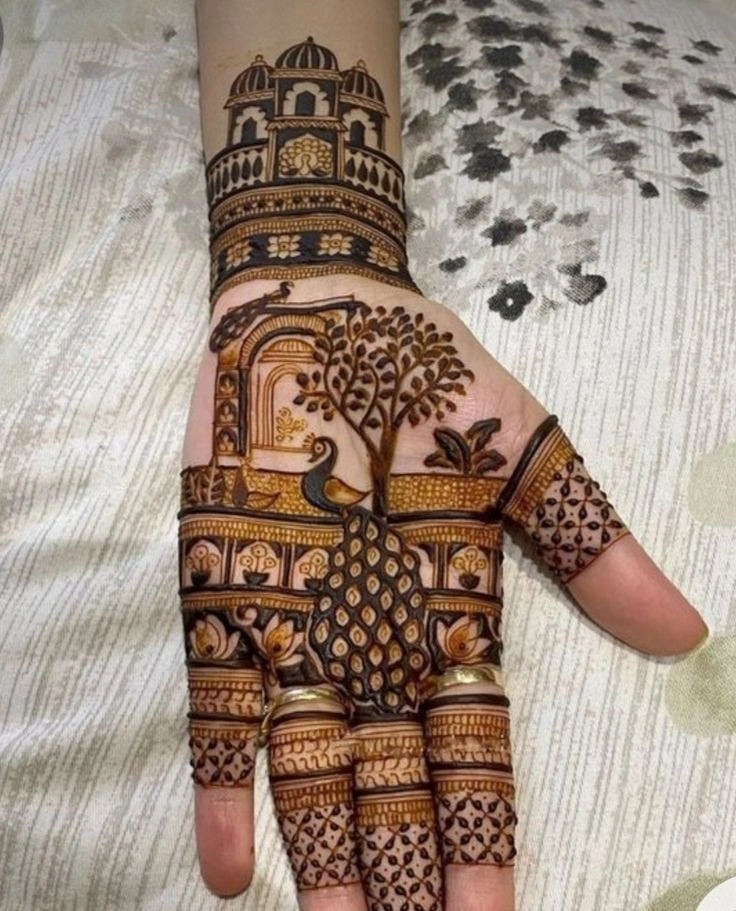
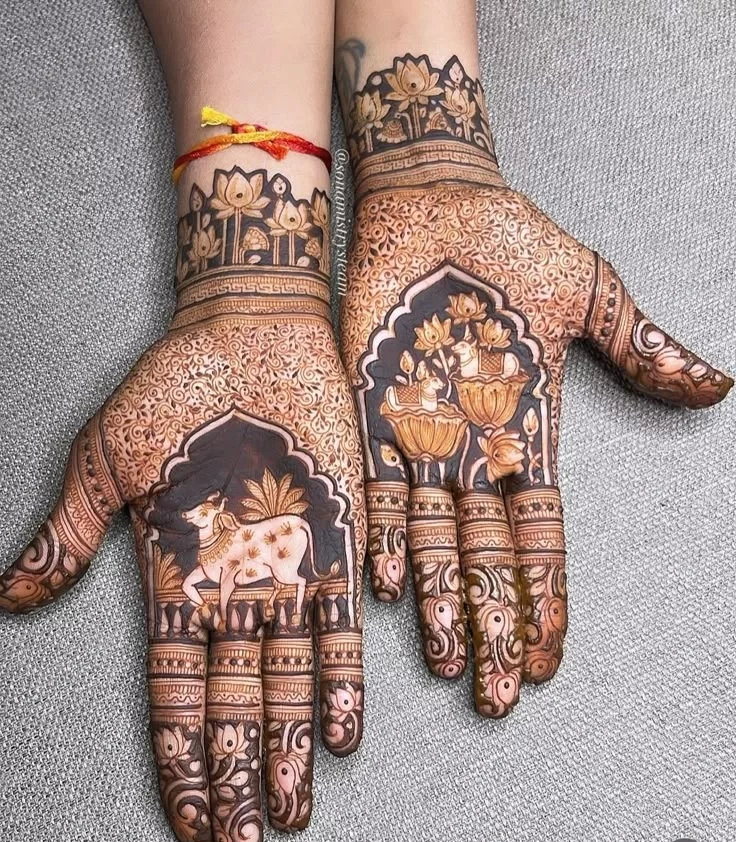
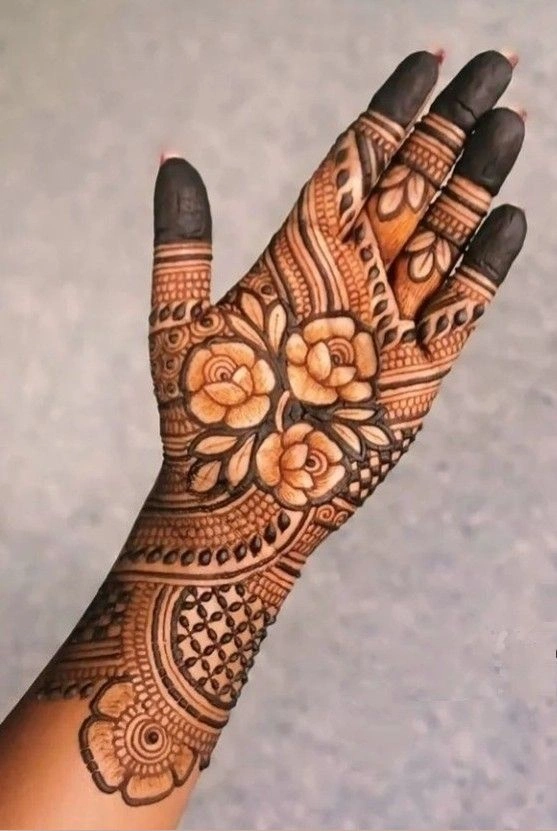
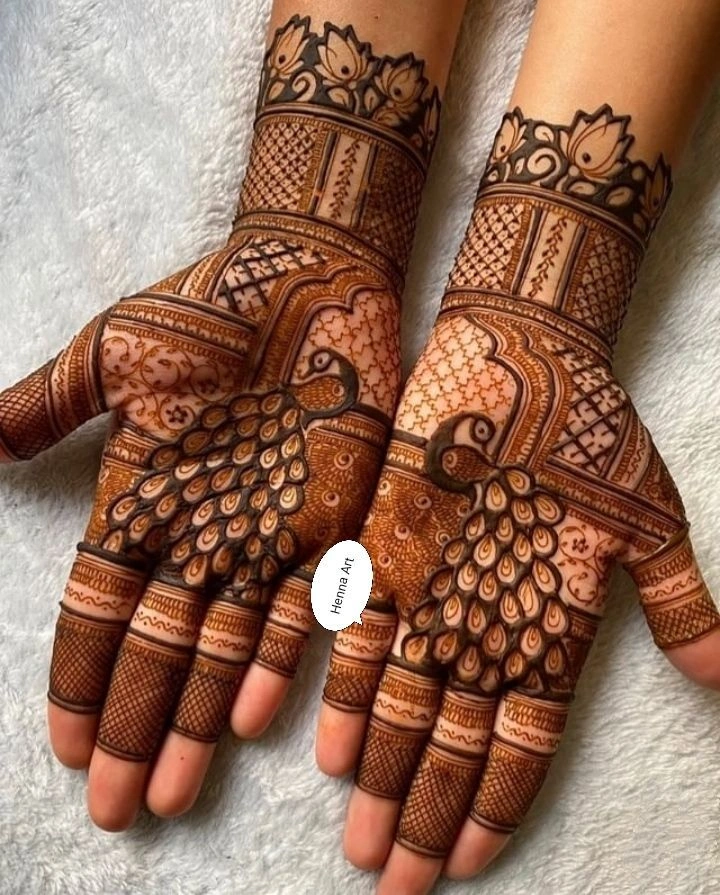
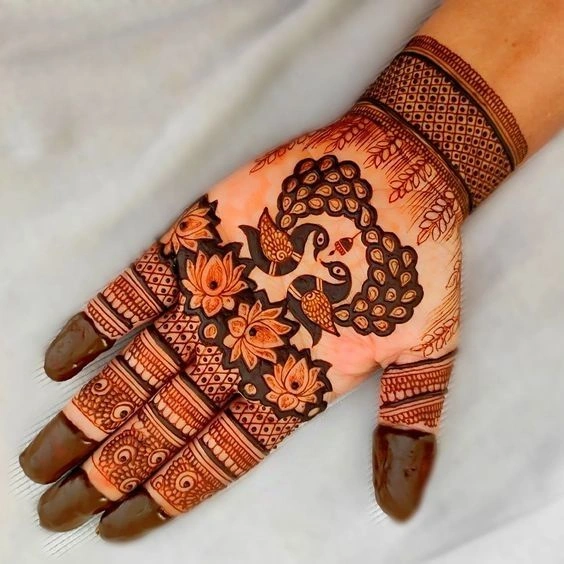
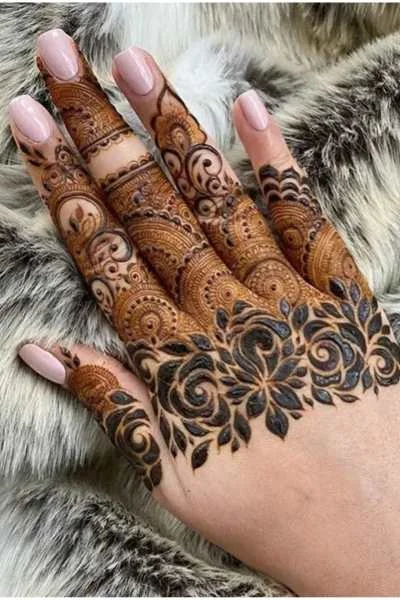
निर्धारित करें कि आप किस प्रकार का मेहंदी डिज़ाइन चाहते हैं। राखी के लिए, आप सरल और सुंदर पैटर्न चुन सकते हैं जैसे फूलों के डिज़ाइन, ज्यामितीय आकृतियाँ, या पारंपरिक मोटिफ़ जैसे पेस्ली, मंडला या मोर के पंख। यदि आप शुरुआती हैं, तो सरल और शुरुआती के लिए उपयुक्त डिज़ाइन चुनना सबसे अच्छा होता है।
3. Prepare the Mehndi Cone or Paste
यदि आप तैयार मेहंदी कॉन का उपयोग कर रहे हैं, तो पेस्ट को चिकना और अच्छी तरह मिश्रित करने के लिए इसे धीरे से मसलें। यदि आप प्राकृतिक मेहंदी पाउडर का उपयोग कर रहे हैं, तो इसे पानी के साथ मिलाकर एक चिकना, गाढ़ा पेस्ट बनाएं। आप रंग को गहरा करने के लिए इसमें थोड़ा नींबू का रस या शक्कर भी जोड़ सकते हैं।
4. Apply Mehndi to Your Hands
अपनी उंगलियों की टिप्स से लेकर हथेली तक मेहंदी लगाना शुरू करें। चुने हुए डिज़ाइन को बनाने के लिए हाथ को धीरे और स्थिर रखें। यदि आप मेहंदी में नए हैं, तो सरल लाइन्स या डॉट्स से शुरुआत करें और धीरे-धीरे जटिल पैटर्न की ओर बढ़ें। एक समय में एक सेक्शन पर ध्यान केंद्रित करें, जैसे केवल हथेली या हाथ का पिछला हिस्सा, और फिर उंगलियों या कलाई की ओर बढ़ें।
5. Let the Mehndi Dry
मेहंदी डिज़ाइन लगाने के बाद, इसे पूरी तरह से सूखने दें। इसमें लगभग 20 से 30 मिनट लग सकते हैं। सुनिश्चित करें कि मेहंदी पूरी तरह से सूखने तक आप कुछ भी न छुएँ और न ही अपने हाथों का उपयोग करें, ताकि डिज़ाइन स्मज न हो।
6. Scrape Off the Dried Mehndi
जब मेहंदी सूख और कठोर हो जाए, तो सूखी पेस्ट को अपनी उंगलियों या किसी钝 उपकरण से धीरे-धीरे खुरचें। पेस्ट हटाने के लिए पानी का उपयोग न करें, क्योंकि पानी रंग को कमजोर कर सकता है और डिज़ाइन फीका पड़ सकता है।
7. Enhance the Stain (Optional)
गहरा रंग पाने के लिए, डिज़ाइन पर थोड़ा नींबू का रस और शक्कर का मिश्रण लगाएँ। इसे कुछ मिनट के लिए रहने दें, फिर धीरे से पोंछ दें। यह रंग को गहरा करने में मदद करता है और लंबे समय तक टिकने वाला रंग सुनिश्चित करता है।
8. Wait for the Stain to Develop
सूखी मेहंदी को खुरचने के बाद, कई घंटों तक अपने हाथ धोने से बचें। रंग अगले 12 से 24 घंटों में धीरे-धीरे विकसित होकर और गहरा हो जाएगा।
9. Celebrate Rakhi
जब आपकी मेहंदी सेट हो जाए और रंग विकसित हो जाए, तो आप राखी मनाने के लिए तैयार हैं! यह सुंदर और जटिल डिज़ाइन त्योहारी माहौल में चार चाँद लगा देगा और भाई-बहन के बंधन का जश्न और भी खास बना देगा।
By following this Step-by-Step Mehndi Application Guide – Rakhi Special, you can create stunning designs that enhance the joy of Rakhi and make the occasion even more memorable. Whether you’re applying it for yourself or as a gift to someone else, mehndi adds a personal touch of tradition and love to the celebrations.
सरल, तेज़ और शुरुआती के लिए अनुकूल डिज़ाइन उन लोगों के लिए एकदम सही समाधान हैं जो बिना तनाव के मेहंदी आज़माना चाहते हैं। चाहे आप बिल्कुल नए हों या कोई जो तेज़ और सुंदर डिज़ाइन चाहता हो, ये डिज़ाइन सरलता और खूबसूरती का सही संतुलन प्रदान करते हैं।
ये डिज़ाइन शुरुआती लोगों के लिए आदर्श हैं क्योंकि इन्हें आसानी से फॉलो किया जा सकता है और इनमें फूल, दिल और ज्यामितीय आकृतियाँ जैसी बुनियादी चीज़ें शामिल होती हैं, जिससे शानदार परिणाम बनाना आसान हो जाता है। यदि आपके पास समय कम है लेकिन फिर भी खूबसूरत मेहंदी डिज़ाइन चाहते हैं, तो ये डिज़ाइन तेज़ और स्टाइलिश दोनों हैं।
इन डिज़ाइनों की खूबसूरती उनकी बहुमुखी प्रतिभा में है, क्योंकि इन्हें किसी भी अवसर के अनुसार ढाला जा सकता है, चाहे वह साधारण मिलन हो या त्योहारी उत्सव। ये डिज़ाइन मेहंदी की दुनिया में प्रवेश करने का एक शानदार तरीका भी हैं, जो आपको आत्मविश्वास और रचनात्मकता विकसित करने में मदद करते हैं।
ये डिज़ाइन उन लोगों के लिए आदर्श हैं जो पारंपरिक मेहंदी में आधुनिक और ठाठ तरीके की तलाश में हैं, क्योंकि इनका मोटिफ़ सरल लेकिन प्रभावशाली होता है। जो लोग हमेशा मेहंदी की प्रशंसा करते थे लेकिन जटिल पैटर्न देखकर डरते थे, उनके लिए यह एकदम सही शुरुआत है।
ये डिज़ाइन बिना किसी तनाव के मेहंदी कला का आनंद लेने का तरीका प्रदान करते हैं, जिससे कोई भी सुंदर डिज़ाइन बना सकता है, चाहे कौशल स्तर कोई भी हो। इसके अलावा, ये डिज़ाइन विभिन्न शैलियों के साथ प्रयोग करने की अनुमति देते हैं, जिससे आप अपनी व्यक्तिगत पसंद के अनुसार सबसे उपयुक्त डिज़ाइन चुन सकते हैं।
चाहे आप किसी विशेष अवसर की तैयारी कर रहे हों या बस अपने दिन में थोड़ी कला जोड़ना चाहते हों, सरल, तेज़ और शुरुआती के लिए अनुकूल डिज़ाइन आपके लिए सही विकल्प हैं। उनकी सरलता और खूबसूरती के साथ, ये डिज़ाइन मेहंदी की दुनिया में परफेक्ट परिचय प्रदान करते हैं। उम्र या अनुभव स्तर की परवाह किए बिना, ये डिज़ाइन सभी के लिए सुलभ हैं और यह सुनिश्चित करते हैं कि हर कोई मेहंदी की रचनात्मक प्रक्रिया का आनंद ले सके।